Build a credit card form with Vue.js

In this tutorial, you will learn how to build a modern credit card form component using Vue.js.
Some neat features
- Auto-rotate card on hover and when switching input.
- two-way binding between inputs and card UI.
- Auto-detect type of card, switch card icon.
- Restrict user from entering nonvalid formats.
- Dynamic backgrounds.
Demo
Can be found here.
Setup
I have created a starter repo with vue.js and all the assets we will be using. If you want to get the final source code it's available in the master branch. Open up a terminal and execute the following commands.
git clone https://github.com/patni1992/vue-credit-card.git
cd vue-credit-card-form
git checkout starter-code
npm install
Dependencies
Except for vue.js we only have vue-imask as an extra dependency. This package will make sure inputs are formatted in the right way.
Creating our form component
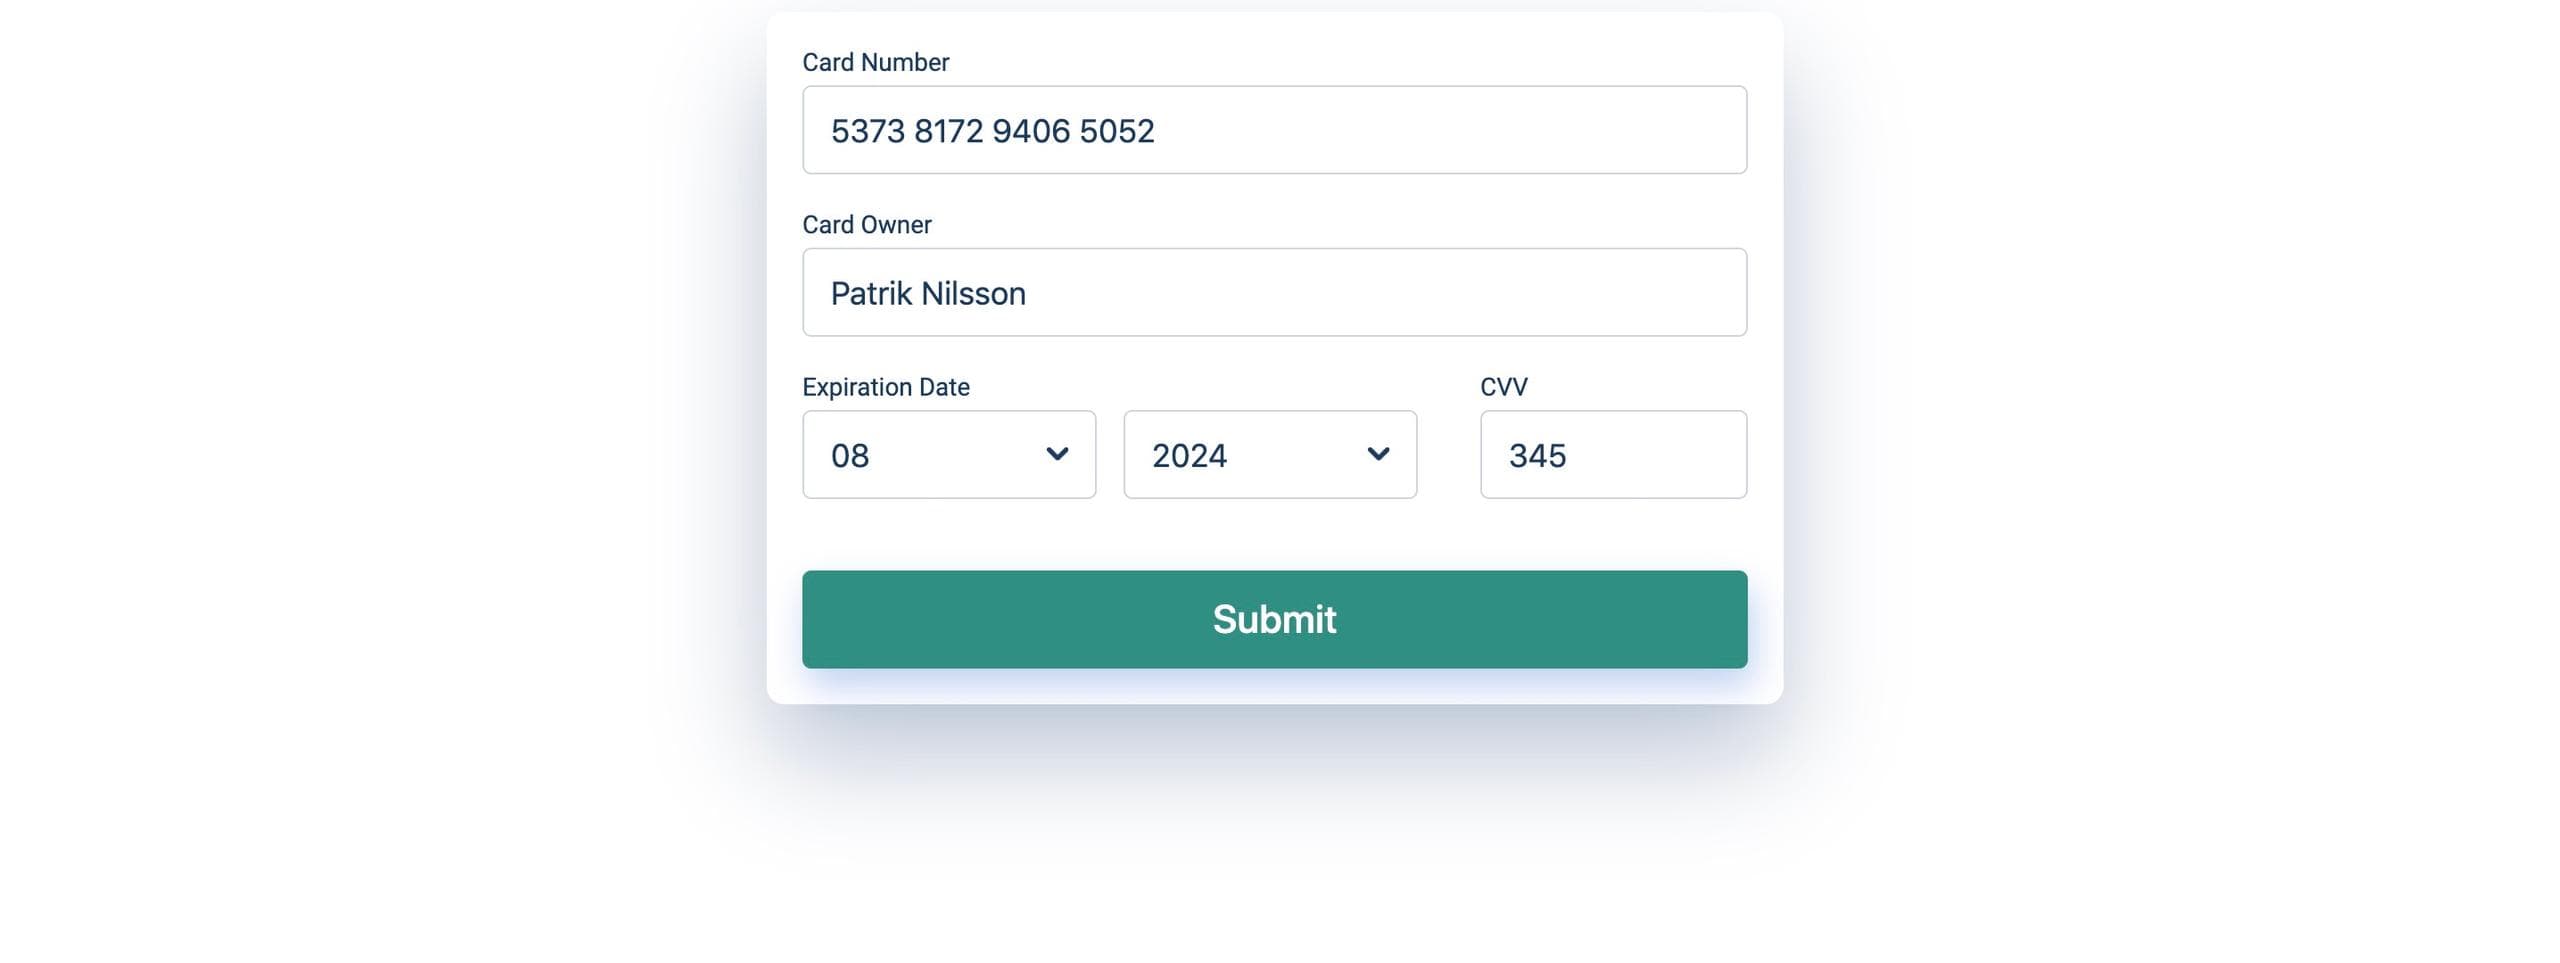
Create a folder called components in src and create CreditCardForm.vue with the following content.
// src/components/CreditCardForm.vue
<template>
  <div class="card-form">
    <div class="card-form__inner">
      <div class="card-input">
        <label for="cardNumber" class="card-input__label">
          Card Number
        </label>
        <input
          :value="cardNumber"
          autofocus
          id="cardNumber"
          class="card-input__input"
          autocomplete="off"
        />
      </div>
      <div class="card-input">
        <label for="cardName" class="card-input__label">
          Card Owner
        </label>
        <input

          id="cardName"
          class="card-input__input"
          v-model="name"
          autocomplete="off"
        />
      </div>
      <div class="card-form__row">
        <div class="card-form__col">
          <div class="card-form__group">
            <label for="cardMonth" class="card-input__label">
              Expiration Date
            </label>
            <select
              class="card-input__input -select"
              id="cardMonth"
              v-model="expireMonth"
            >
              <option value="" disabled selected>Month</option>
              <option
                v-for="n in 12"
                :value="n < 10 ? '0' + n : n"
                :key="n"
              >
                {{ 10 > n ? "0" + n : n }}
              </option>
            </select>
            <select
              class="card-input__input -select"
              id="cardYear"
              v-model="expireYear"
            >
              <option value="" disabled selected>Year</option>
              <option
                v-for="(n, $index) in 12"
                :value="$index + currentYear"
                :key="n"
              >
                {{ $index + currentYear }}
              </option>
            </select>
          </div>
        </div>
        <div class="card-form__col -cvv">
          <div class="card-input">
            <label for="cardCvv" class="card-input__label">CVV</label>
            <input

              class="card-input__input"
              id="cardCvv"
              :value="cvv"
              autocomplete="off"
            />
          </div>
        </div>
      </div>
      <button @click="submitCard" class="card-form__button">
        Submit
      </button>
    </div>
  </div>
</template>

<script>
export default {
  data() {
    return {
      cardNumber: "5373 8172 9406 5052",
      expireMonth: "",
      expireYear: "",
      name: "",
      cvv: "",
      currentYear: new Date().getFullYear(),
    };
  },
  methods: {
    submitCard() {
      alert(`
        ${this.cardNumber}\n
        ${this.name}\n
        ${this.expireMonth}/${this.expireYear}\n
        ${this.cvv}`);
    },
  },
};
</script>

<style scoped lang="scss">
.card-container {
  margin: 30px auto 50px auto;
}

.card-form {
  max-width: 570px;
  margin: auto;
  width: 100%;

  &__inner {
    background: #fff;
    box-shadow: 0 30px 60px 0 rgba(90, 116, 148, 0.4);
    border-radius: 10px;
    padding: 20px;
  }

  &__row {
    display: flex;
    align-items: flex-start;
  }

  &__col {
    flex: auto;
    margin-right: 15px;

    &:last-child {
      margin-right: 0;
    }

    &.-cvv {
      max-width: 150px;
    }
  }

  &__group {
    display: flex;
    align-items: flex-start;
    flex-wrap: wrap;

    .card-input__input {
      flex: 1;
      margin-right: 15px;

      &:last-child {
        margin-right: 0;
      }
    }
  }

  &__button {
    width: 100%;
    height: 55px;
    background: #38a294;
    border: none;
    border-radius: 5px;
    font-size: 22px;
    font-weight: 500;
    box-shadow: 3px 10px 20px 0px rgba(35, 100, 210, 0.3);
    color: #fff;
    margin-top: 20px;
    cursor: pointer;

    &:hover {
      background: darken(#38a294, 5%);
    }
  }
}

.card-input {
  margin-bottom: 20px;
  &__label {
    margin-bottom: 5px;
    color: #1a3b5d;
    width: 100%;
    display: block;
    text-align: left;
  }
  &__input {
    width: 100%;
    height: 50px;
    border-radius: 5px;
    box-shadow: none;
    border: 1px solid #ced6e0;
    transition: all 0.3s ease-in-out;
    font-size: 18px;
    padding: 5px 15px;
    background: none;
    color: #1a3b5d;

    &:hover,
    &:focus {
      border-color: #38a294;
    }

    &:focus {
      box-shadow: 0px 10px 20px -13px rgba(32, 56, 117, 0.35);
    }
    &.-select {
      -webkit-appearance: none;
      background-image: url("/img/select.png");
      background-size: 12px;
      background-position: 90% center;
      background-repeat: no-repeat;
      padding-right: 30px;
    }
  }
}
</style>
Here we created a form with all the fields, setup state and added some styling. You might be wondering why some inputs are using v-model and why some are using :value. This is because for the cvv and cardnumber we will use vue-mask to set the value for us, more on that later.
For the month dropdown, we iterate from 1-12 and format the number with 2 digits. On the year dropdown, we start iterating from the current year and stop when we have iterated 12 times.
Next step is to import it in our App.vue component and add some general styling. In components/App.vue add the following code.
<template>
  <div id="app">
    <credit-card-form />
  </div>
</template>

<script>
import CreditCardForm from "./components/CreditCardForm";

export default {
  name: "app",
  components: {
    CreditCardForm
  }
};
</script>

<style lang="scss">
#app {
  @import url("https://fonts.googleapis.com/css?family=Source+Code+Pro:400,700&display=swap");
  @import url("https://fonts.googleapis.com/css?family=Roboto&display=swap");
  font-family: "Roboto", sans-serif;
  margin: 0 auto;
  text-align: center;
  color: #2c3e50;

  * {
    box-sizing: border-box;
    &:focus {
      outline: none;
    }
  }
}
</style>
Run npm serve in the terminal.
If you open up http://localhost:8080 you should now be able to see the form.
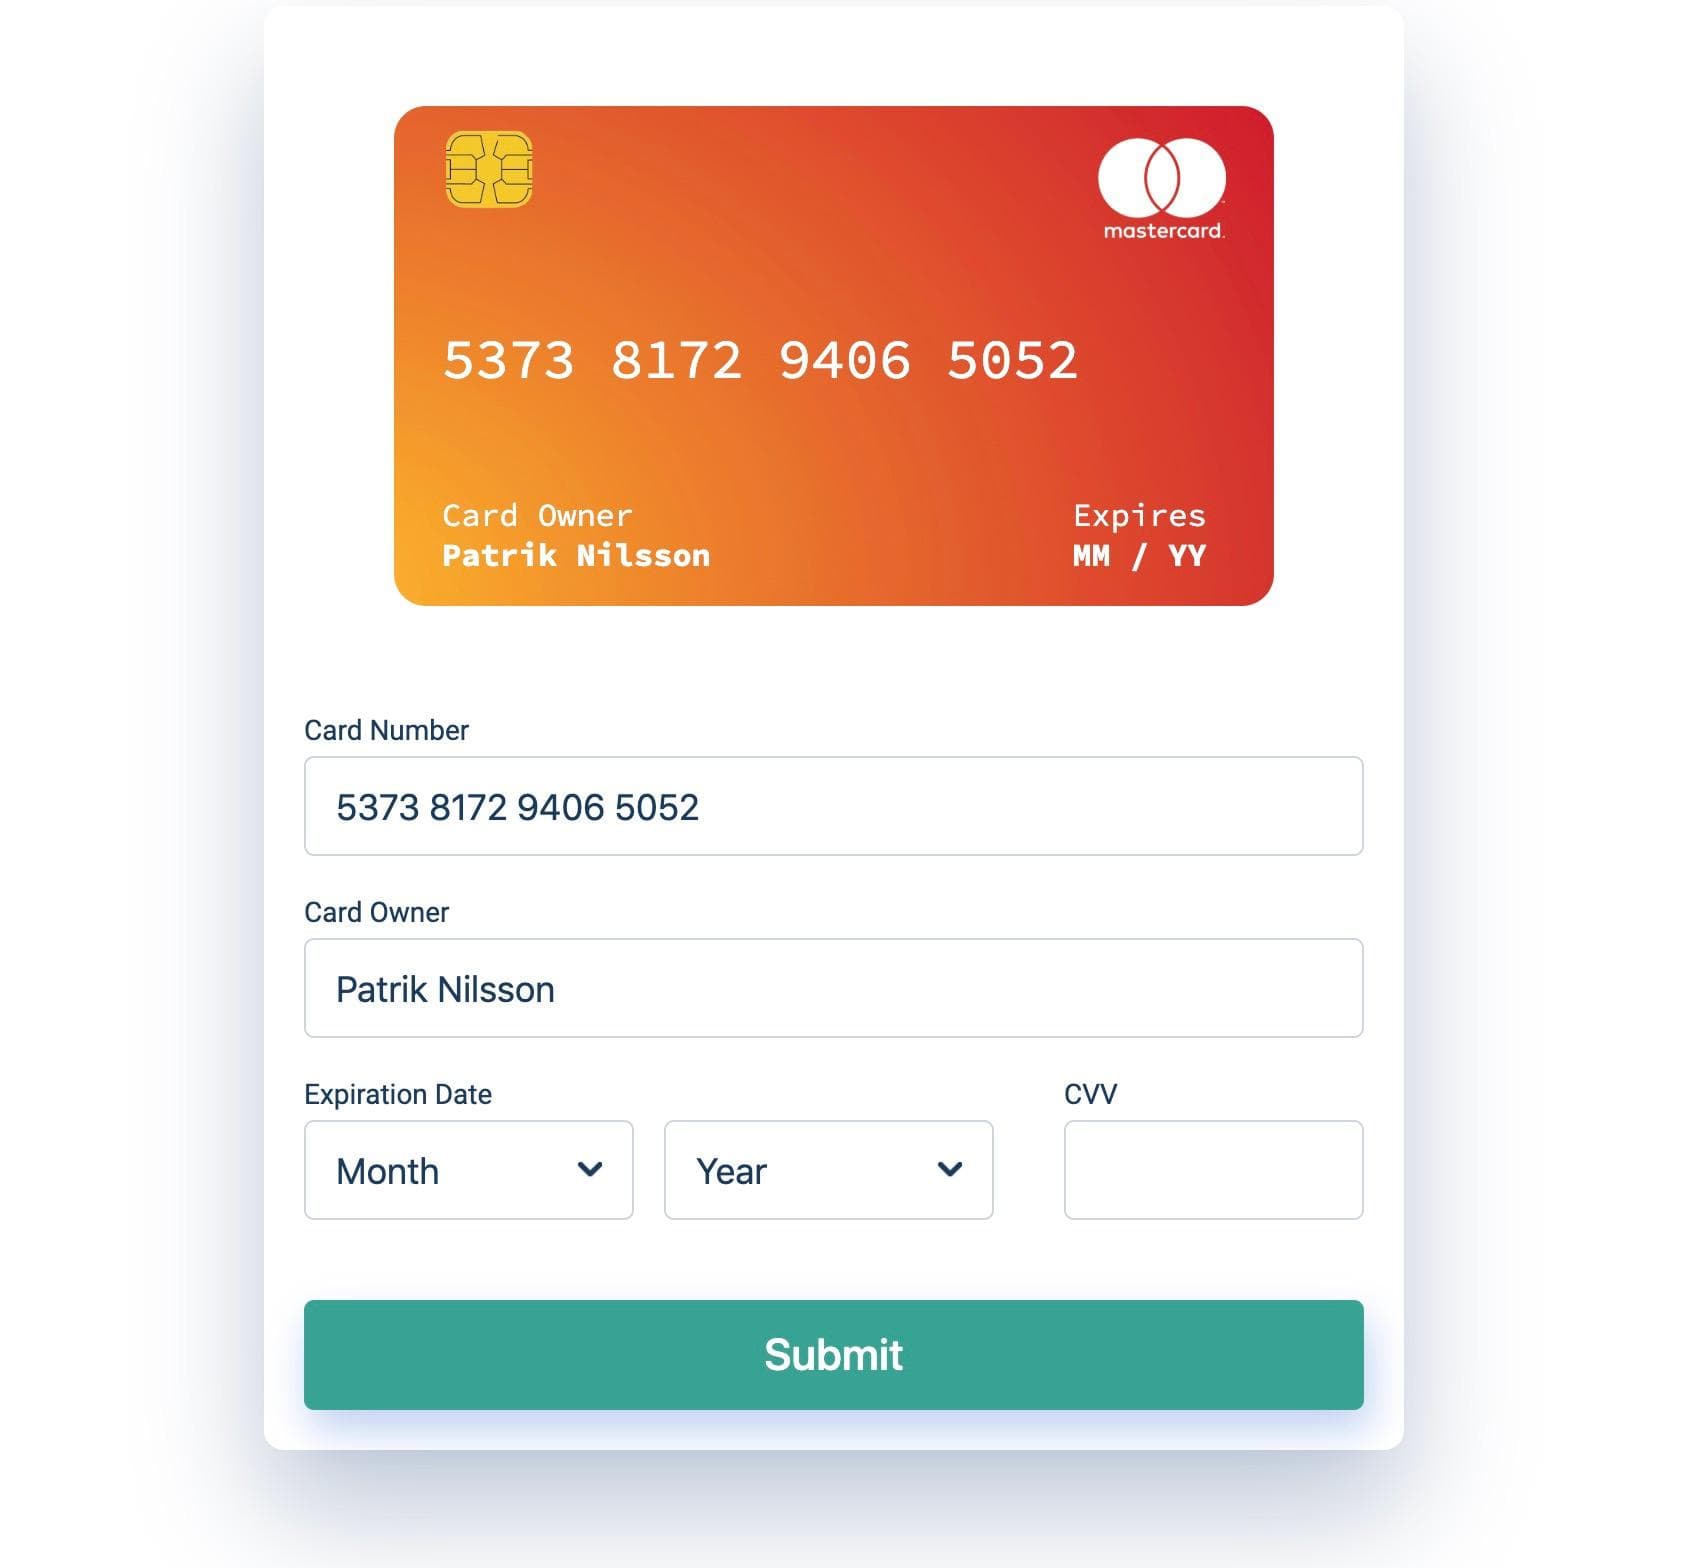
Creating our Credit Card component
This component will work as a wrapper for frontside and backside of our credit card. In components create CreditCard.vue and add the following code.
<template>
  <div class="credit-card">
    <div
      class="credit-card__inner"
      :class="{
        'show-back': showBack
      }"
    ></div>
  </div>
</template>

<script>
export default {
 data() {
    return {
      backgroundImage: this.randomCard()
    };
  },
  methods: {
    randomCard() {
      return `/img/card-${Math.floor(Math.random() * 5) + 1}.jpg`;
    }
  },
  props: {
    cardNumber: String,
    expireMonth: String,
    expireYear: String,
    cvv: String,
    name: String,
    showBack: Boolean,
    symbolImage: String
  }
};
</script>

<style scoped lang="scss">
.credit-card {
  font-family: "Source Code Pro", monospace;
  max-width: 420px;
  width: 100%;
  height: 245px;
  background-color: transparent;
  color: white;
  perspective: 1000px;
  display: inline-block;

  &:hover &__inner {
    transform: rotateY(180deg);
  }

  &__inner {
    position: relative;
    width: 100%;
    height: 100%;
    text-align: center;
    transition: transform 0.6s;
    transform-style: preserve-3d;
  }

  @media screen and (max-width: 480px) {
    height: 210px;
  }

  @media screen and (max-width: 360px) {
    height: 180px;
  }
}
.show-back {
  transform: rotateY(180deg);
  &:hover {
    transform: rotateY(0deg);
  }
}
</style>
We will supply this component with all the form values as props plus two additional props, showBack and symbolmage.
showBack Will control what side is showing if true show back else show front.
symbolImage Is the path to provider symbol, for example Mastercard or Visa.
randomCard This method will give us back a random image as background, if you open up public/img you will see 5 images with numbers, img1 to img5.
Feel free to replace these images with any images you want. I recommend Unsplash they provide great quality images that can be used in your projects. If you decide to add or remove images just remember to update the number 5 in randomCard method to correct number.
You might be wondering what the transform properties are used for they will add a nice flipping effect.
In componenets/CreditCardForm.vue add the following code below card-form__inner
<div class="card-container">
  <credit-card
    :expireYear="expireYear"
    :expireMonth="expireMonth"
    :cardNumber="cardNumber"
    :name="name"
    :cvv="cvv"
    :showBack="showBack"
    :symbolImage="'/img/' + symbolImage + '.png'"
  />
</div>
Import CreditCard.vue create a new components object with CreditCard inside. At the end of the data object add two new properties showBack and symbolImage.
<script>
import CreditCard from "./CreditCard.vue";
export default {
  components: {
    CreditCard
  },
  data() {
    return {
      ...
      showBack: false,
      symbolImage: "mastercard"
    };
  },
  ...
}
</script>
Creating frontside of the credit card
In components create CardFront.vue and add the following code.
<template>
  <div class="card-front">
    <img class="card-front__image" :src="backgroundImage" />
    <img class="card-front__symbol" :src="symbolImage" />
    <img class="card-front__chip" :src="'/img/chip.png'" />
    <p class="card-front__number">{{ cardNumber }}</p>
    <div class="card-front__info">
      <p>Expires</p>
      <p class="card-front__expires value">
        {{ expireMonth || "MM" }} /
        {{ (expireYear && sliceYear) || "YY" }}
      </p>
    </div>
    <div class="card-front__info left">
      <p>Card Owner</p>
      <p class="value">{{ name || "name" }}</p>
    </div>
  </div>
</template>

<script>
export default {
  props: {
    backgroundImage: String,
    symbolImage: String,
    cardNumber: String,
    expireMonth: String,
    expireYear: String,
    name: String
  },
  computed: {
    sliceYear() {
      return this.expireYear.toString().slice(2);
    }
  }
};
</script>

<style scoped lang="scss">
$x-space: 24px;
$y-space: 16px;
.card-front {
  position: absolute;
  width: 100%;
  height: 100%;
  backface-visibility: hidden;
  z-index: 100;
  &__image {
    width: 100%;
    height: 100%;
    border-radius: 16px;
  }
  &__number {
    position: absolute;
    font-size: 26px;
    top: 35%;
    left: x-space;
  }
  &__chip {
    position: absolute;
    top: $y-space;
    left: $x-space;
    height: 44px;
  }
  &__symbol {
    position: absolute;
    top: $y-space;
    right: $x-space;
    height: 48px;
  }
  &__info {
    position: absolute;
    bottom: $y-space;
    right: $x-space;
    color: white;
    text-align: left;
    margin: 0;
    &.left {
      left: $x-space;
    }
    .value {
      font-weight: bold;
    }
    p {
      margin: 0;
    }
  }
  &__expires {
    right: auto;
    left: $x-space;
  }
  @media screen and (max-width: 480px) {
    &__number {
      font-size: 22px;
    }
    &__info {
      font-size: 12px;
    }
    &__chip {
      height: 34px;
    }
    &__symbol {
      height: 38px;
    }
  }
  @media screen and (max-width: 360px) {
    &__number {
      font-size: 18px;
    }
  }
}
</style>
Here we create the structure for the frontside of our card. This contains the typcial data you would see on a credit card. We also specify some default values in case no values are provided for example
{{ expireMonth || "MM" }} /
{{ (expireYear && sliceYear) || "YY" }}
Most of the css is to adjust positon of different elements.
sliceYear is used to format year from 4 digits to 2, for example 2019 -> 19.
Let's import it in components/CreditCard.vue and see how it looks.
Inside the div with the class card-inner add
<card-front
  :backgroundImage="backgroundImage"
  :symbolImage="symbolImage"
  :cardNumber="cardNumber"
  :expireMonth="expireMonth"
  :expireYear="expireYear"
  :name="name"
/>
Import CardFront.vue and create components object with CardFront as key.
<script>
import CardFront from "./CardFront";
export default {
  components: {
    CardFront
  },
}
...
</script>
Open up http://localhost:8080 and you should be able to see the front of our credit card. If you update the card owner in the form it will also be updated in the card, however, you might notice nothing happens if you update the card number we will fix this soon.
Try to reload the page multiple times and you should see how the background for the card is changing. If you hover over the card you will see it's flipping, however, it looks a bit strange because we have not yet created the backside of the card.
Creating backside of the credit card
In components create CardBack.vue and add the following code.
<template>
 <div class="card-back">
    <img class="card-back__image" :src="backgroundImage" />
    <div class="card-back__stripe"></div>
    <div class="card-back__cvv">
      {{ cvv }}
    </div>
  </div>
</template>

<script>
export default {
  props: {
    cvv: String,
    backgroundImage: String
  }
};
</script>

<style scoped lang="scss">
.card-back {
  position: absolute;
  width: 100%;
  height: 100%;
  backface-visibility: hidden;
  z-index: 100;
  transform: rotateY(180deg);

  &__image {
    width: 100%;
    height: 100%;
    border-radius: 16px;
  }

  &__stripe {
    padding: 24px;
    position: relative;
    bottom: 90%;
    opacity: 0.8;
    width: 100%;
    background-color: black;
  }

  &__cvv {
    border-radius: 4px;
    position: absolute;
    bottom: 35%;
    left: 50%;
    transform: translateX(-50%);
    width: 92%;
    background-color: white;
    color: black;
    text-align: right;
    font-size: 22px;
    min-height: 45px;
    padding: 8px;
  }

  @media screen and (max-width: 360px) {
    &__stripe {
      padding: 18px;
    }
    &__cvv {
      min-height: 36px;
      padding: 4px;
    }
  }
}
</style>
This component is quite small and most of it again is css. We give backgroundImage same as our CardFront.vue, display magnetic stripe and cvv.
Let's import it in CreditCard.vue and see how it looks.
Below <card-front /> add this code
<card-back :cvv="cvv" :backgroundImage="backgroundImage" />Import CardBack and add it to components.
<script>
import CardFront from "./CardFront";
import CardBack from "./CardBack";
export default {
  components: {
    CardFront,
    CardBack
  },
}
...
</script>
f you now open up the web applications and hover the card you should see it flips and show the backside.

Fixing card number and cvv, detect the type of card
As you may have noticed cvv or card number is not working. It's now time to fix it and use vue-imask to restrict a user from entering wrong formats.
In src directory create a file called masks.js with the following content.
export const cardMasks = {
  mask: [
    {
      mask: "0000 0000 0000 0000",
      regex: "^(5[1-5]\\d{0,2}|22[2-9]\\d{0,1}|2[3-7]\\d{0,2})\\d{0,12}",
      cardtype: "mastercard"
    },
    {
      mask: "0000 0000 0000 0000",
      regex: "^4\\d{0,15}",
      cardtype: "visa"
    },
    {
      mask: "0000 0000 0000 0000",
      cardtype: "Unknown"
    }
  ],

  dispatch(appended, dynamicMasked) {
    const number = (dynamicMasked.value + appended).replace(/\D/g, "");

    for (let i = 0; i < dynamicMasked.compiledMasks.length; i++) {
      const re = new RegExp(dynamicMasked.compiledMasks[i].regex);
      if (number.match(re) != null) {
        return dynamicMasked.compiledMasks[i];
      }
    }
  }
};

export const cvvMask = {
  mask: "0000"
};
Here I added 3 masks visa, mastercard and unkown in case it does not match. If you would like to support more types of cards, for example, Amex Card just do a quick google search for credit card regex. If you do, don't forget to add matching icon in public/img
what does dispatch do?
It might look complicated but basically, all that it does is to check if the pattern matches any mask, in that case return it. More information about dispatch can be found at the documentation imask.js.
Open up CreditCardForm.vue and import IMaskDirective and { cardMasks, cvvMask }, also at the end of the export default object add IMaskDirective as a directive.
<script>
import CreditCard from "./CreditCard.vue";
import { IMaskDirective } from "vue-imask";
import { cardMasks, cvvMask } from "@/masks";
export default {
  ...
  directives: {
    imask: IMaskDirective
  }
}
</script>
under submitCard method all the following methods and update data properties to include cardMasks and cvvMask.
<script>
...
export default {
  ...
  data() {
    return {
      cardMasks: cardMasks,
      cvvMask: cvvMask,
      ...
    };
  },
  methods: {
    onAcceptCardType(e) {
      const maskRef = e.detail;
      const type = maskRef.masked.currentMask.cardtype;

      if (type !== "Unknown") {
        this.symbolImage = type;
      }

      this.cardNumber = maskRef.value;
    },
    onAcceptCvv(e) {
      const maskRef = e.detail;
      this.cvv = maskRef.value;
    }
  },
  ...
};
</script>
Here we get the reference of the element, we then check if the type is not unknown and update symbolImage.
vue-mask is adding those properties and remember in mask.js we have 3 types Unknown, mastercard and visa.
After that, we update this.cardNumber to get the value from our reference element.
onAcceptCvv
get the reference and updates the value.
Now Update cardNumber input with the following code
<input
  :value="cardNumber"
  autofocus
  id="cardNumber"
  class="card-input__input"
  autocomplete="off"
  v-imask="cardMasks"
  @accept="onAcceptCardType"
/>
and update cardCvv input
 <input
  class="card-input__input"
  id="cardCvv"
  :value="cvv"
  autocomplete="off"
  v-imask="cvvMask"
  @accept="onAcceptCvv"
  />
If you now edit the input values for number and cvv you should see how it also updates the card. It will also format it right by adding spaces and limiting length.
Try to add 5372071303778443 as card number and change it to 4197394215553472, you will notice it will now detect automatically if it's a visa or mastercard.
Turn card on focus input
When we are focusing cvv input we want to show the backside of our card else show frontside.
All we have to do is adding @focus and @blur to the cvv input in CreditCardForm.vue. This will set showBack to true or false, we then pass it as props.
 <input
  class="card-input__input"
  id="cardCvv"
  :value="cvv"
  autocomplete="off"
  v-imask="cvvMask"
  @accept="onAcceptCvv"
  @focus="showBack = true"
  @blur="showBack = false"
  />
Summary
You learned how to create a credit card form in vue.js, hopefully, you were able to follow along. If you ever got stuck full source code can be found at https://github.com/patni1992/vue-credit-card-form.git.
Feel free to edit the code how you like, some ideas might be to add more masks or change background images.
I hope you enjoyed this tutorial.