Form validation in Vue.js with Vuelidate

Form validation is something that can be very tricky and can give you a headache really fast. While it's fine to write the validation from scratch for smaller applications, this becomes really cumbersome the more inputs we have and the complexity grows. In this article, we will look at the library Vuelidate for Vue.js
What is Vuelidate?
Vuelidate is a validation library for Vue.js, instead of specifying validation logic in the template you specify it in the data model. In more data-oriented applications this will lead to cleaner templates and easier to write custom validation rules.
Setting up the project
In your terminal run this. Here we are installing the Vue CLI, and creating a project with the name validation-with-vuelidate.
npm install -g @vue/cli
# OR
yarn global add @vue/cli

vue create validation-with-vuelidate
Here we can just select the default.

Change directory to our project and then Install our dependency Vuelidate.
cd validation-with-vuelidate
yarn add vuelidate
Start the development environment.
yarn run serveImport vuelidate and register it in src/main.js
import Vuelidate from "vuelidate"
Vue.use(Vuelidate)
Clean up and add our starter code
Remove HelloWorld.vue in src/componenets/ and create a file called FormValidation.vue in src/componenets/
Add the following code to src/componenets/FormValidation.vue
<template>
  <div>
    <form class="validate-form">
      <h1>Form validation with Vuelidate</h1>
      <div>
        <div class="input-group">
          <input placeholder="Name" />
        </div>
        <div class="input-group">
          <input type="email" placeholder="Email" />
        </div>
        <div class="input-group">
          <input type="password" placeholder="Password" />
        </div>
        <div class="input-group">
          <input type="password" placeholder="Confirm Password" />
        </div>
        <div class="input-group">
          <textarea placeholder="Tell me something about yourself" />
        </div>
      </div>
      <button @click.prevent="submit" class="submit">
        Submit
      </button>
    </form>
  </div>
</template>
Some styling to make it look a bit better.
<style scoped>
.error {
  color: #D9585C;
  margin-top: 5px;
  display: block;
}

form {
  width: 470px;
  margin: 0 auto 0;
}

.input-group {
  text-align: left;
  margin: 0 0 20px;
}

input,
select,
textarea {
  box-sizing: border-box;
  border: 2px solid #ccc;
  border-radius: 4px;
  padding: 10px;
  width: 100%;
  resize: none;
  transition: .3s;
}
input:focus,
textarea:focus {
  border: 2px solid #999;
  outline: none;
}

textarea {
  min-height: 100px;
}

.submit {
  display: block;
  width: 100%;
  padding: 10px;
  border: 2px solid #ccc;
  border-radius: 4px;
  background: transparent;
  color: #ccc;
  transition: .3s;
}
.submit:hover {
  color: #AAD661;
  border-color: #AAD661;
}
.submit:disabled,
.submit[disabled] {
  border: 2px solid #999999;
  background-color: #cccccc;
  color: #666666;
}

</style>
In src/App.vue update the code to this.
<template>
<div id="app">
<form-validation />
</div>
</template>
<script>
import FormValidation from './components/FormValidation.vue'
export default {
name: 'app',
components: {
FormValidation
}
}
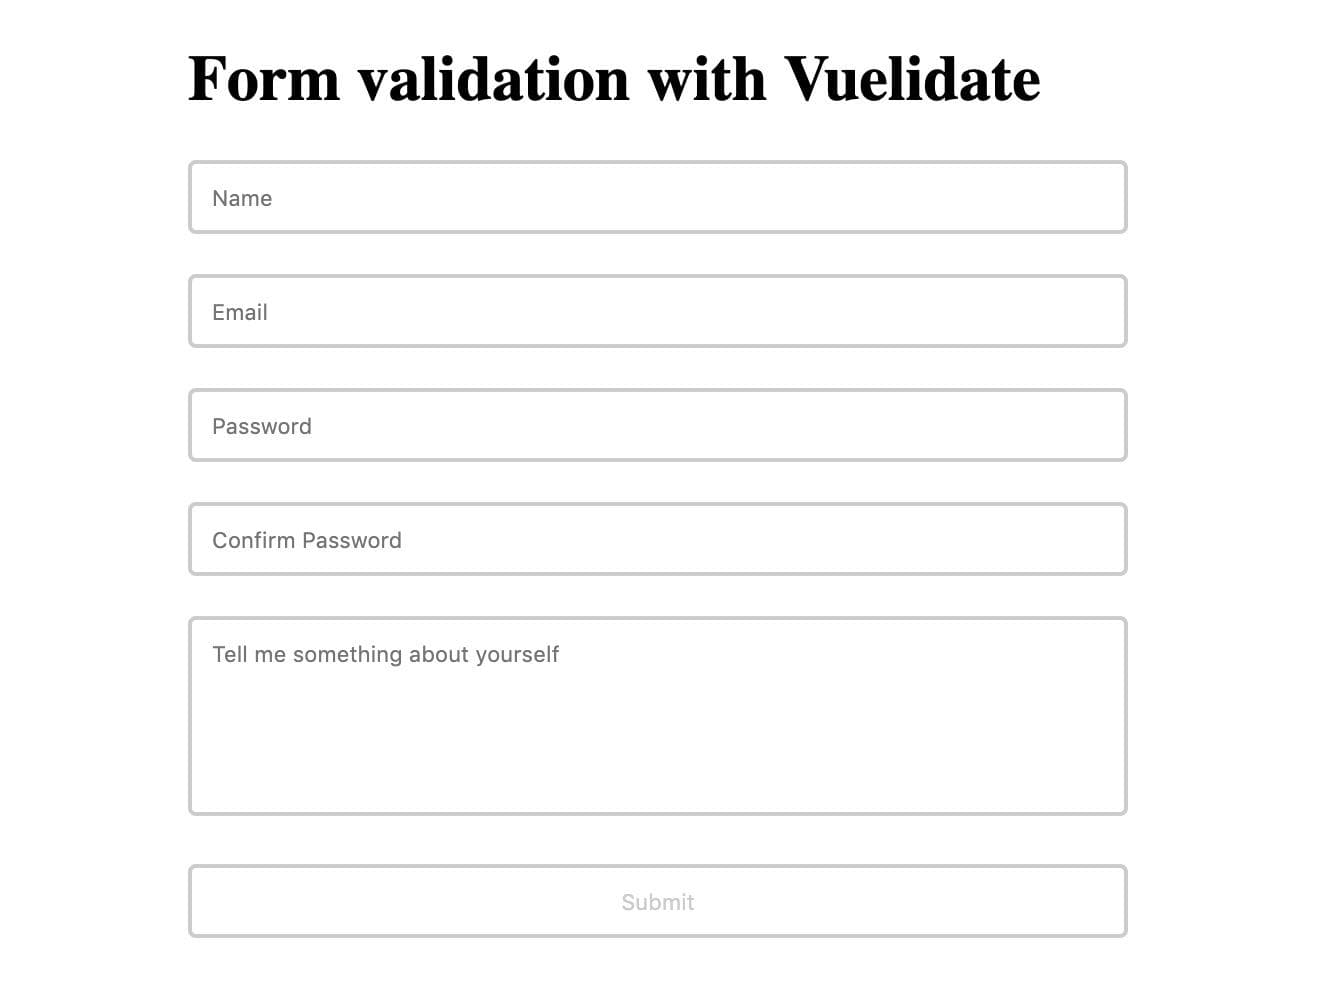
</script>We now have our basic form laid out and you should have something like this.
Adding our validations rules
Inside src/components/FormExample.vue add this code to the bottom of the file.
<script>
  import { required, minLength, email, sameAs } from "vuelidate/lib/validators"

  export default {
    data() {
      return {
        name: "",
        email: "",
        password: "",
        confirmPassword: "",
        about: ""
      }
    },
    validations: {
      name: {
        required,
        minLength: minLength(2)
      },
      email: {
        email,
        required
      },
      password: {
        required,
        minLength: minLength(5)
      },
      confirmPassword: {
        sameAsPassword: sameAs("password")
      }
    }
  }
</script>
We first import some of the built-in validations that come with Vuelidate. The full list can be found here. By just reading their names we can get an idea of what they do.
- Required: not allowed to be empty, data needs to be present.
- minLength: set the minimum allowed length of the data.
- email: accepts a valid email address, make sure the format is right.
- sameAs: Check to see if it's equal with a given property.
We then initialize all our fields with empty values.
For each value that is gonna be validated, we have to specify it as a key inside the validations object. Pay attention to the keys specified in the data object it's the same keys as in the validaitons object.
So for example for the property name, we specify it as an object and supply it with all the validation rules we need.
name: {
  required,
  minLength: minLength(2)
}
name is now required and the minimum length is 2. Some validations rules you need to supply parameters while others you don't need it.
Another example.
confirmPassword: {
  sameAsPassword: sameAs("password")
}
Here we specify the key to be confirmPassword same as we have in our data object. We use the validation rule sameAs and pass a parameter with the name of another form field.
So we are saying we want the confirmPassword to be the same as the password field.
We have our validation rules, but how do we actually display some feedback to the user?
The $v object
To get a better overview of what is available, let's print the $v object.
created() {
    // eslint-disable-next-line
    console.log(this.$v)
},(// eslint-disable-next-line prevents eslint to throw errors in the terminal.)
Realod the browser and you should see something similar in the console.
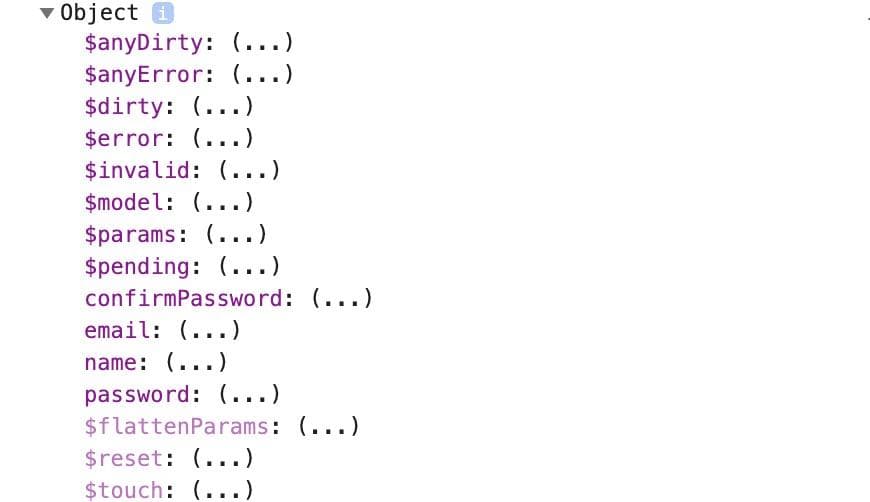
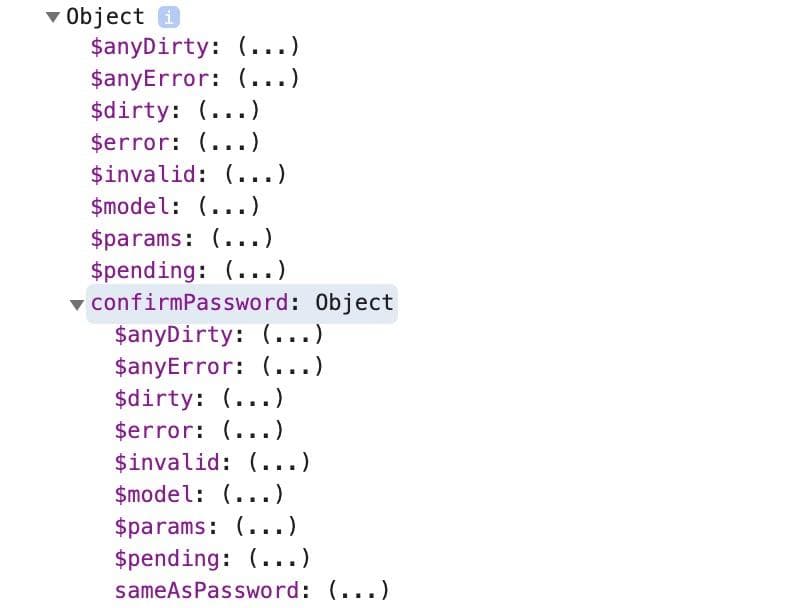
All of the values we have specified in the validations object are available here. For example, we can see the confirmPassword key with different values. Not only do we have the keys we specified to be validated we also have some globals like $dirty, $error, $invalid, and so on.
Let's update our code in the template.
<template>
<form class="validate-form">
<h1>Form validation with Vuelidate</h1>
<div class="input-group">
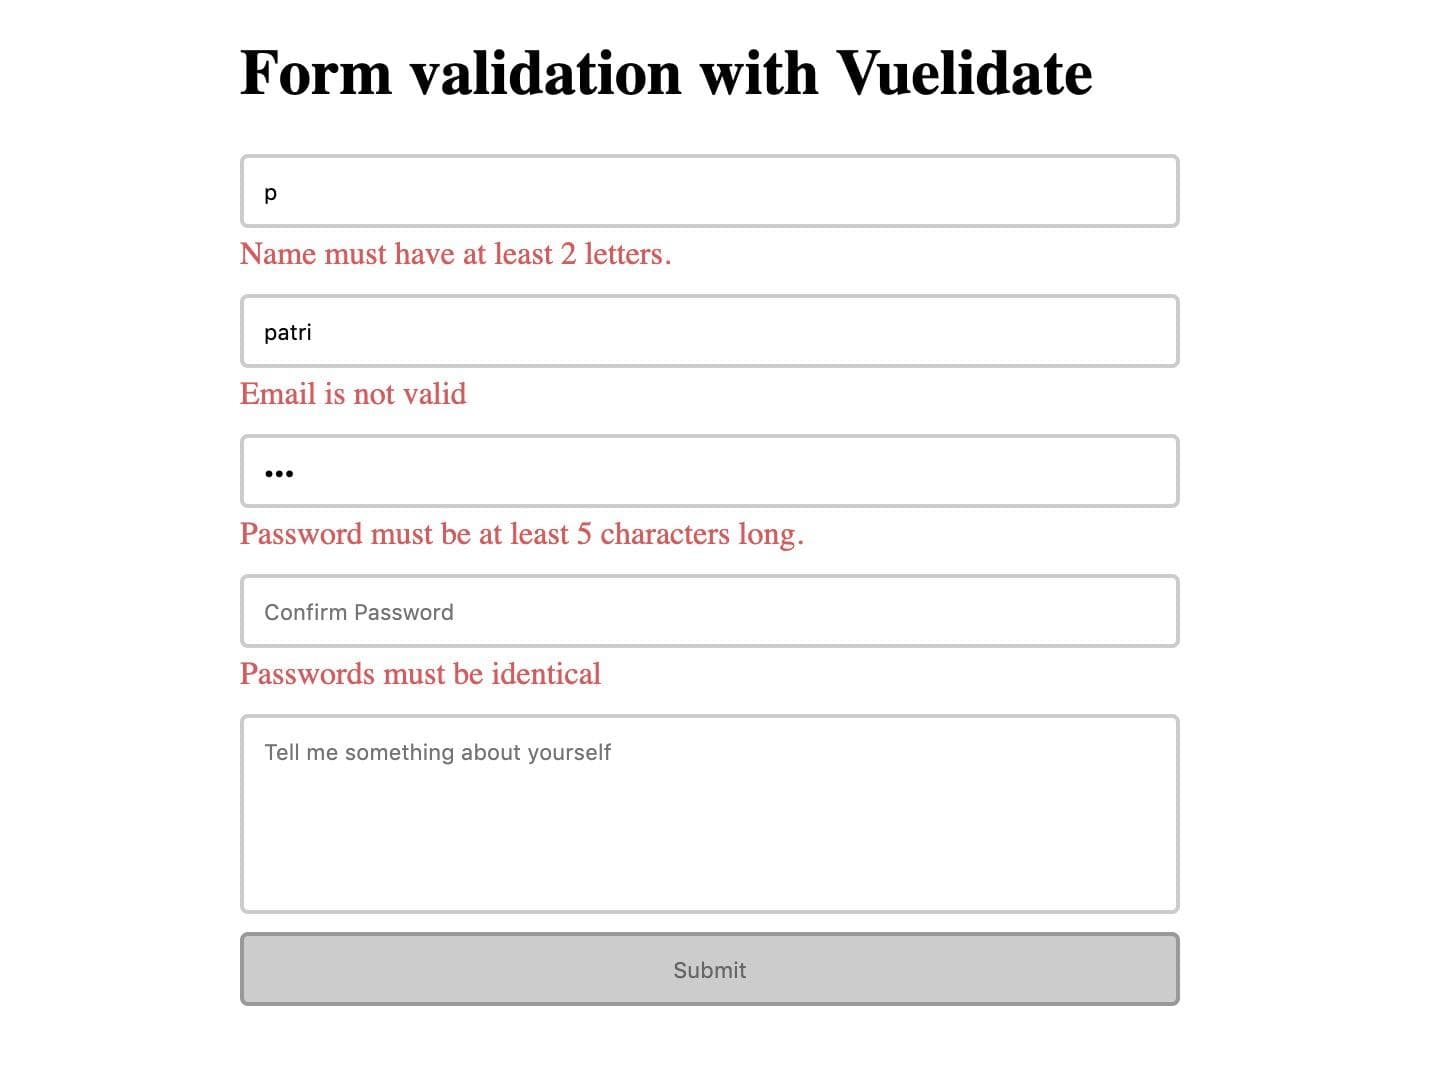
<input v-model="$v.name.$model" placeholder="Name" />
<p v-if="!$v.name.required" class=" error">Name is required</p>
<p v-if="!$v.name.minLength" class=" error">
Name must have atleast {{$v.name.$params.minLength.min}} letters.
</p>
</div>
<div class="input-group">
<input type="email" placeholder="Email" v-model="$v.email.$model" />
<p v-if="!$v.email.required" class=" error">Email is required</p>
<p v-if="!$v.email.email" class="error">Email is not valid</p>
</div>
<div class="input-group">
<input
type="password"
placeholder="Password"
v-model="$v.password.$model"
/>
<p v-if="!$v.password.required" class=" error">Password is required</p>
<p v-if="!$v.password.minLength" class=" error">
Password must be at least {{$v.password.$params.minLength.min}}
characters long.
</p>
</div>
<div class="input-group">
<input
type="password"
placeholder="Confirm Password"
v-model="$v.confirmPassword.$model"
/>
<p v-if="!$v.confirmPassword.sameAsPassword" class="error">
Passwords must be identical
</p>
</div>
<div class="input-group">
<textarea placeholder="Tell me something about yourself" />
</div>
<button :disabled="!$v.$anyDirty || $v.$anyError" class="submit">
Submit
</button>
</form>
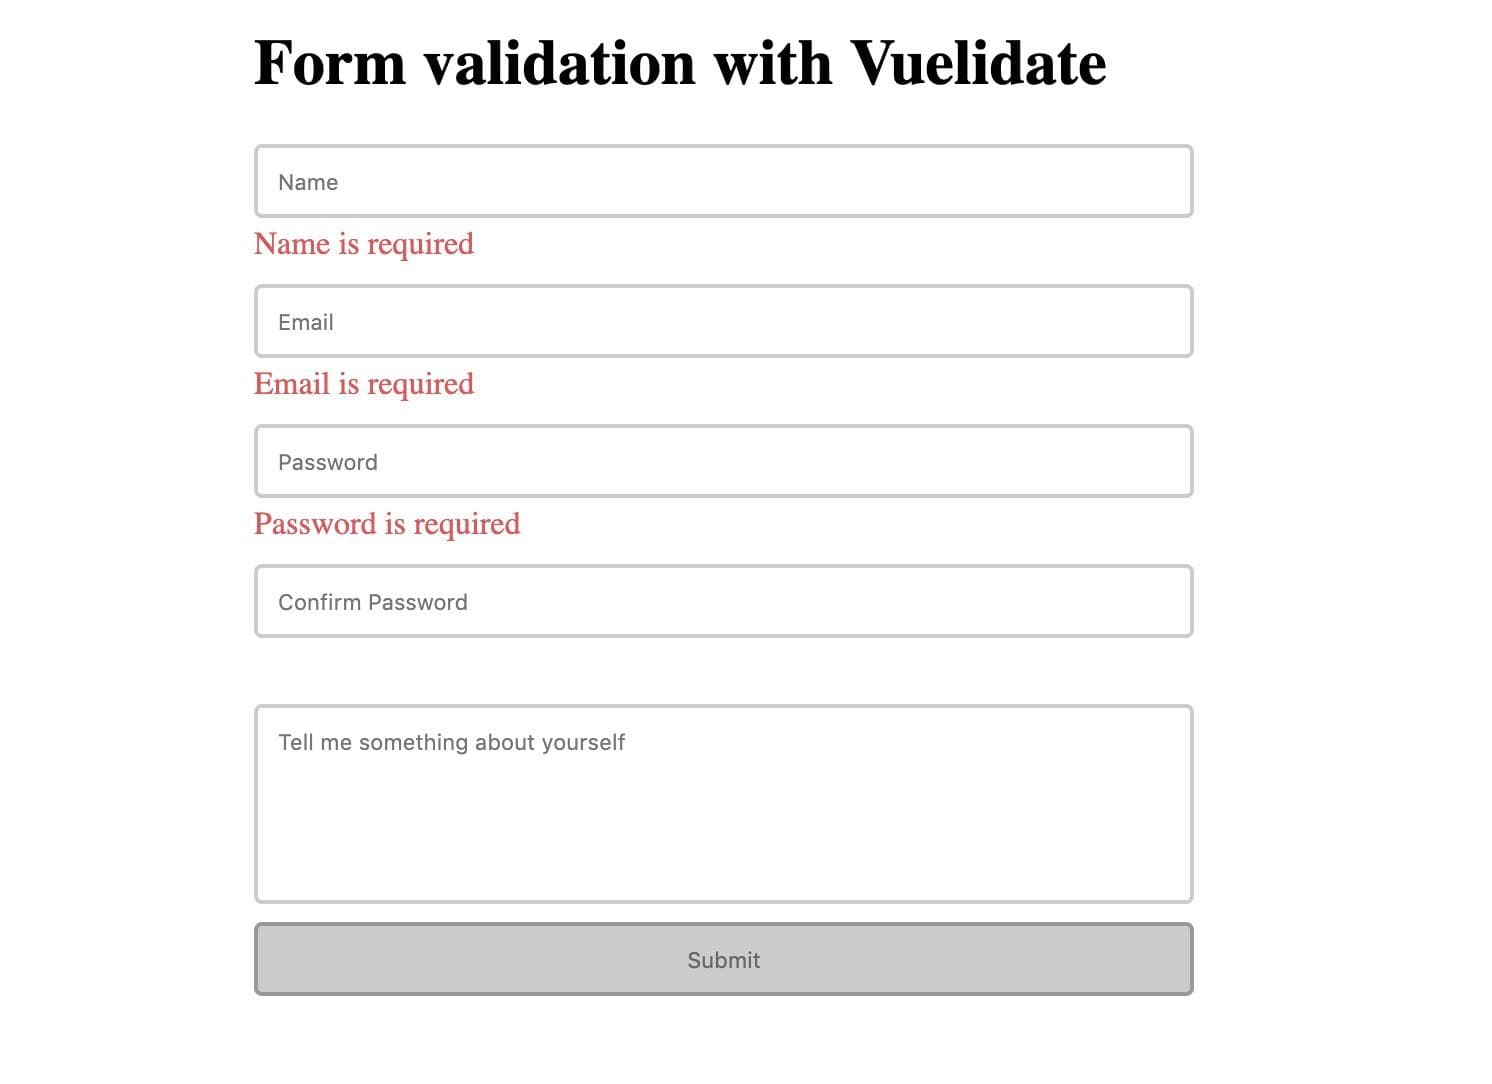
</template>For all the inputs we bind the v-model with a key we specified in the validiations object.
<input v-model="$v.name.$model" placeholder="Name" />When the input is changed all the validation rules for that bound key will run.
<p v-if="!$v.name.required" class=" error">Name is required</p>
<p v-if="!$v.name.minLength" class=" error">
  Name must have atleast {{$v.name.$params.minLength.min}} letters.
</p>
Here we listen for the required and min minLength, remember the $v object we printed before? Because we have bound the v-model on the input to $v.name.$model it will update those values automatically for us.
For the rest of the inputs, they follow the same pattern just swap out the names.
Here we are checking if the form has not been touched or if it has any errors if it has we disable the button
<button
  :disabled="!$v.$anyDirty || $v.$anyError"
  @click.prevent="test"
  class="submit"
>
  Submit
</button>
The form should now look something like this.
Custom validation
We can easily create custom validations in case the built-in ones are not enough. In the src folder create a file called validators.js with the following content.
import { helpers } from "vuelidate/lib/validators"

export function mustContainJavaScript(value) {
  return !helpers.req(value) || value.includes("JavaScript")
}
Here we import a helper function from Vuelidate if no value is supplied this will not trigger the validation. Next, we check if the word JavaScript is included in the value.
To use our newly created validation rule, open up. src/componenets/FormExample.vue and import mustContainJavaScript.
<script>
  import { required, minLength, email, sameAs } from 'vuelidate/lib/validators'
  import { mustContainJavaScript } from '../validators.js'
  ...
</script>
In the validations object add a new key called about and add mustContainJavaScript as a rule.
validations: {
  about: {
      mustContainJavaScript
    },
   ...
}
Update this part of the template.
<div class="input-group">
  <textarea placeholder="Tell me something about yourself" />
</div><div class="input-group">
<textarea
placeholder="Tell me something about yourself"
v-model="$v.about.$model"
/>
<p v-if="!$v.about.mustContainJavaScript" class="error">
Must include the word JavaScript
</p>
</div>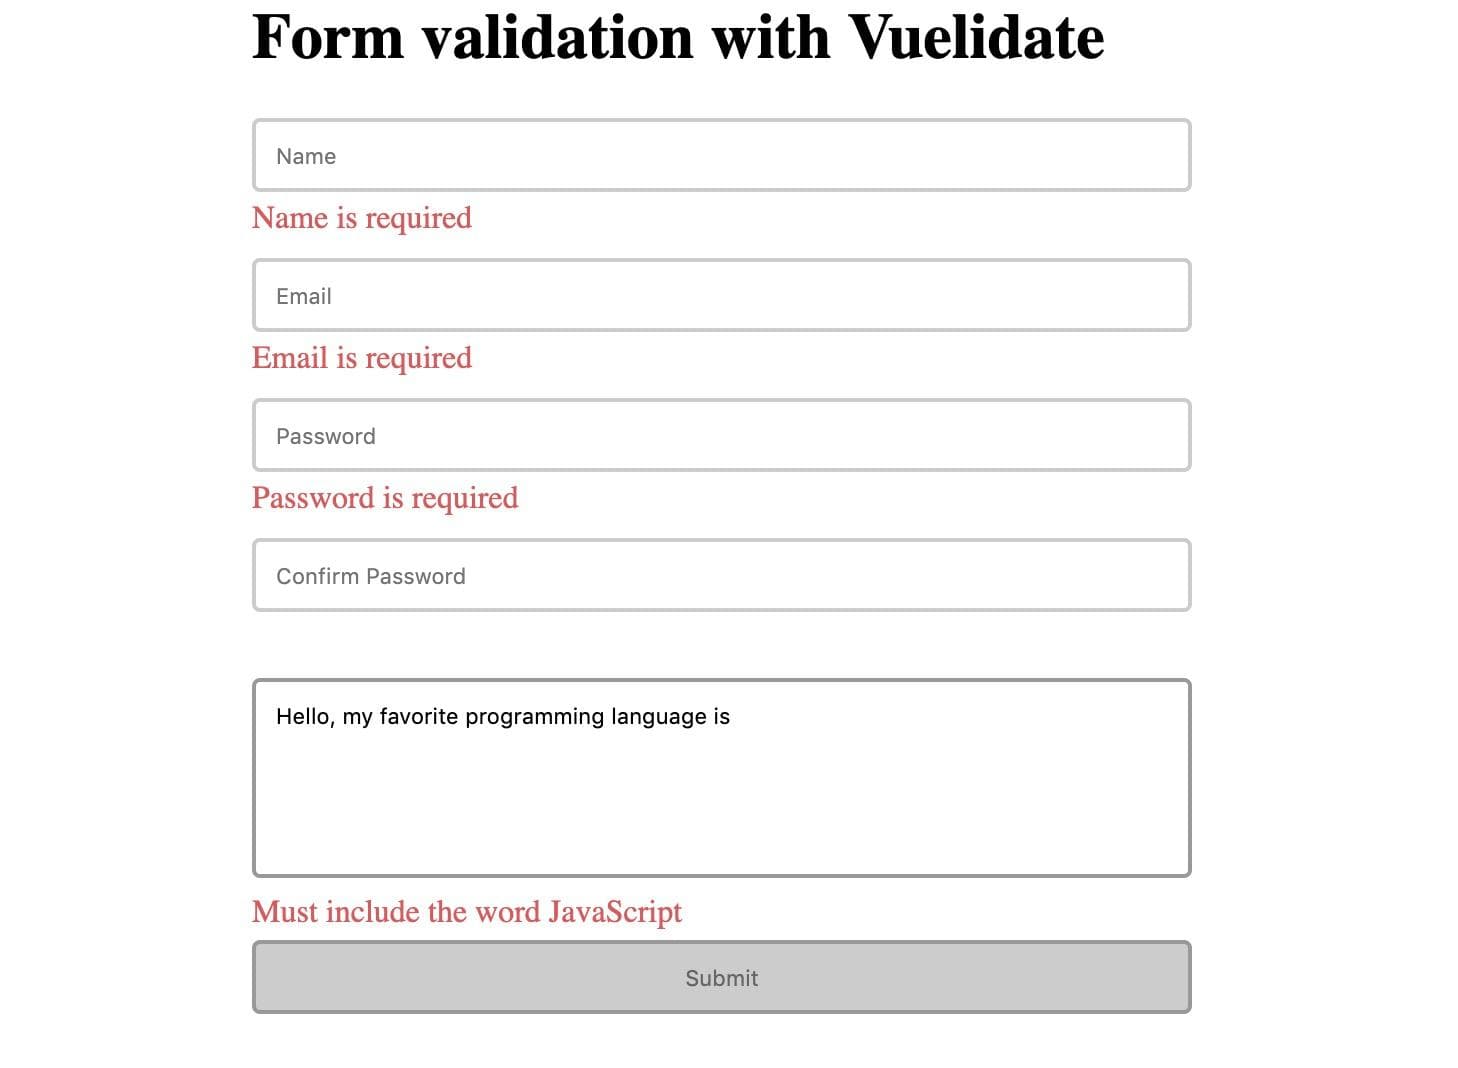
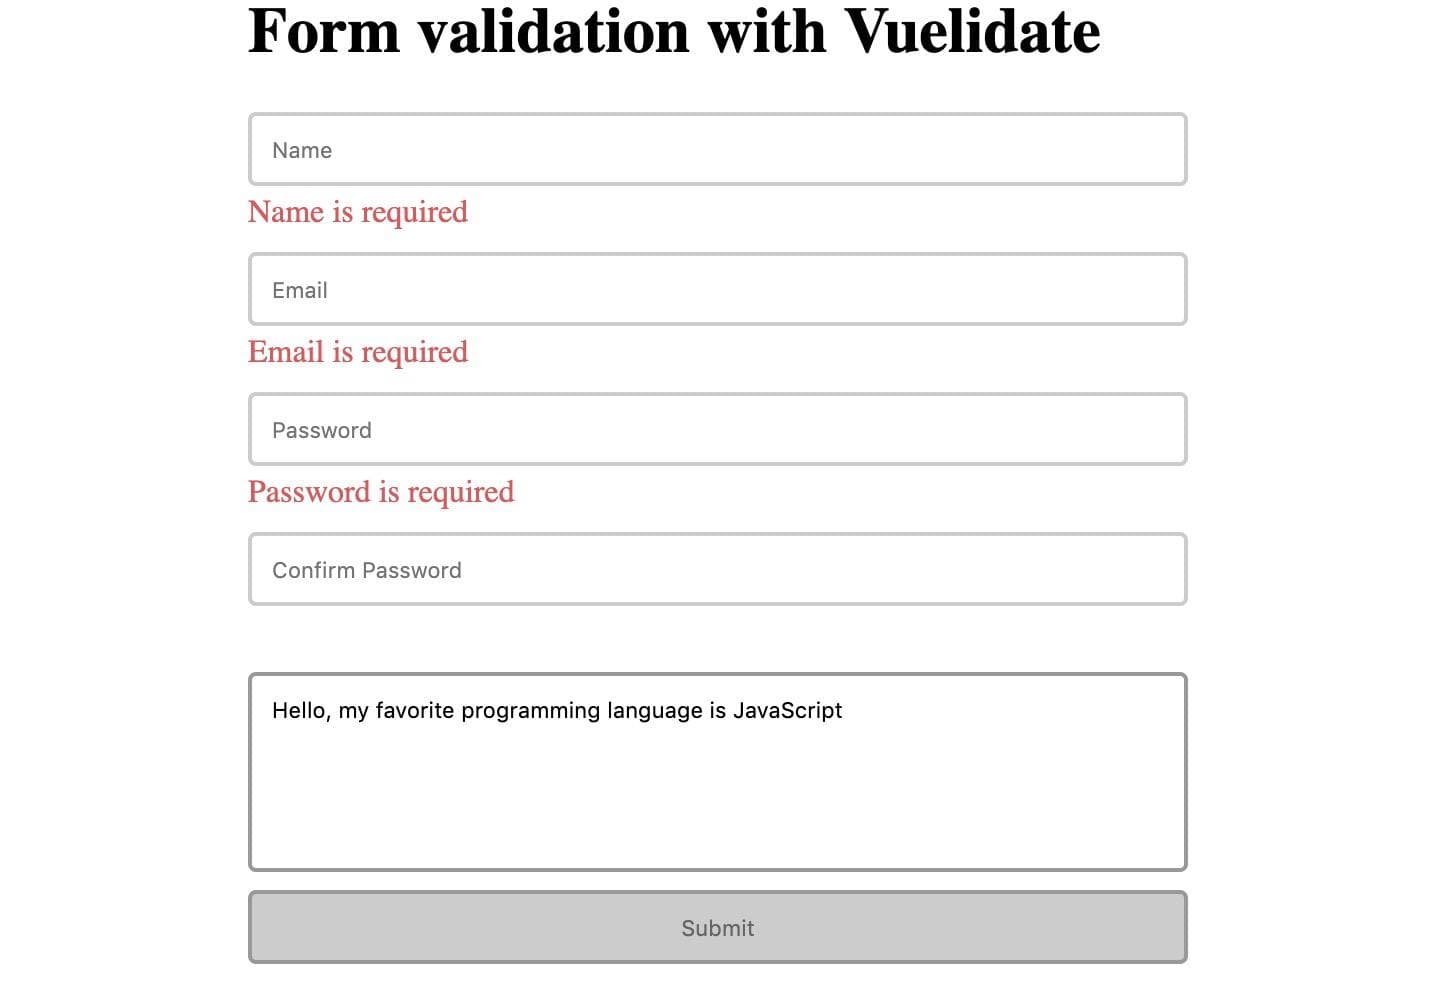
If the word JavaScript is not in the text it shows an error.
Validate on submit
If you think this is a bit noisy, I agree with you. My preferred way is to validate before a submit is done. Let's see how we can do that.
Updating the template in src/componenets/FormExample.vue
<template>
  <form class="validate-form">
    <h1>Form validation with Vuelidate</h1>
      <div class="input-group">
        <input v-model.trim="$v.name.$model" placeholder="Name" />
        <p v-if="submitted && !$v.name.required" class=" error">
          Name is required
        </p>
        <p v-if="submitted && !$v.name.minLength" class=" error">
          Name must have at least {{$v.name.$params.minLength.min}} letters.
        </p>
      </div>
      <div class="input-group">
        <input
          type="email"
          placeholder="Email"
          v-model.trim="$v.email.$model"
        />
        <p v-if="submitted && !$v.email.required" class=" error">
          Email is required
        </p>
        <p v-if="submitted && !$v.email.email" class="error">
          Email is not valid
        </p>
      </div>
      <div class="input-group">
        <input
          type="password"
          placeholder="Password"
          v-model.trim="$v.password.$model"
        />
        <p v-if="submitted && !$v.password.required" class=" error">
          Password is required
        </p>
        <p v-if=" submitted && !$v.password.minLength" class=" error">
          Password must be at least {{$v.password.$params.minLength.min}}
          characters long.
        </p>
      </div>
      <div class="input-group">
        <input
          type="password"
          placeholder="Confirm Password"
          v-model.trim="$v.confirmPassword.$model"
        />
        <p
          v-if="submitted && !$v.confirmPassword.sameAsPassword"
          class="error">
          Passwords must be identical
        </p>
      </div>
      <div class="input-group">
        <textarea
          placeholder="Tell me something about yourself"
          v-model="$v.about.$model"
        />
        <p v-if="submitted && !$v.about.mustContainJavaScript" class="error">
          Must include the word JavaScript
        </p>
      </div>
    <button @click.prevent="submit" class="submit">Submit</button>
  </form>
</template>
Not much has changed here what we have done is for every error add a check to see if the form has been submitted. We also removed the disable prop from the submit button and call submit when the button is clicked.
Add the submitted property to the data object.
 data() {
    return {
      submitted: false,
      ...
    }
  },
Implementing the submit method.
methods: {
    submit() {
      this.submitted = true
      this.$v.$touch()

      if (this.$v.$error) {
        return
      }

      alert("Yaaay! form has now been submitted!!")
    }
  },
When the form is submitted we set submitted to true, remember in our template we check this boolean for every error. To manually be able to trigger errors we call this.$v.$touch(), if we leave this out errors will not be shown for inputs that have not been modified.
We then check if any errors exist, if it does just end the function with a return or if no errors were detected we submit it.
Conclusion
Creating form validations should be easy and fast. I hope you saw the power of using Vuelidate.
Benefits
- Cleaner templates, no validation rules inside.
- Great structure, organize all logic the same as methods, data, computed values.
- Easy to write custom validation.
- Highly reusable.
Hopefully, you will use Vuelidate in your next project to create more complex validations.