Sending emails in Node.js
A common feature in todays web application is to send emails, some examples are password recovery, promotions, order confirmation. Sending emails in node.js is as easy as pie, thanks to a library called Nodemail. In this tutorial, you will learn how to send emails and how to use email templates.
Getting started
Run the below commands in your terminal
npm init -y
npm i nodemailer express dotenv nodemailer-express-handlebars
Here we initialized our project and installed our dependencies nodemailer, express, dotenv and nodemailer-express-handlebars.
Dontenv will be used to store values to an smtp server, the benefits of using environment variables are we can swap out values without having to touch the code, and we can set up different values for different environments, for example, develop or production.
express Minimal web framework to speed up development.
nodemailer Send emails in a easy way.
nodemailer-express-handlebars Makes it possible to use templates with nodemailer.
Setup express
Next we will setup the starter code for express, creat a file called app.js with the following content.
require("dotenv").config()
const express = require("express")
const nodemailer = require("nodemailer")
const app = express()
const port = 3000

app.get('/', (req, res) => res.send("Send emails with node.js"))

app.listen(port, () => console.log(`app listening on port ${port}!`))
Open up your terminal and run node app.js. Here we set up a simple web application, you can now visit http://localhost:3000 and you should see the message "Send emails with node.js".
Create MailTraip account
Mailtrap is a service that lets you test sending emails. You will get credentials to an smtp server and when sending mail you can log in to a gui with an inbox and inspect all emails. Setup your account at Mailtrap.
Create .env file
In the root create a file called .env, replaces the values with the one you got when creating your Mailtrap account.
SMTP_HOST=smtp.mailtrap.io
SMTP_PORT=2525
SMTP_USER=""
SMTP_PASSWORD=""
FROM_EMAIL="shop@example.com"
Sending email
require("dotenv").config()
const express = require("express")
const nodemailer = require("nodemailer")
const app = express()
const port = 3000

const transporter = nodemailer.createTransport({
  host:  process.env.SMTP_HOST
  port:  process.env.SMTP_PORT,
  auth: {
    user:  process.env.SMTP_USER,
    pass:  process.env.SMTP_PASSWORD
  }
});

app.get('/', (req, res) => res.send("Send emails with node.js"))

app.listen(port, () => console.log(`app listening on port ${port}!`))
To send emails we need to create a transporter object and pass our environment variables for the smtp server. To find out about more possible configurations checkout Nodemailer documentation.
Now we just need to call the sendEmail method from the transporter object and pass it some information about the mail, for example, a title, some content, receiver and specify who is sending the email.
require("dotenv").config()
const express = require("express")
const nodemailer = require("nodemailer")
const app = express()
const port = 3000
const transporter = nodemailer.createTransport({
host: process.env.SMTP_HOST,
port: process.env.SMTP_PORT,
auth: {
user: process.env.SMTP_USER,
pass: process.env.SMTP_PASSWORD
}
})
app.get("/", async (req, res) => {
const mailInfo = {
from: '"John Doe 😎" <johndoe132@example.com>',
to: "testemail333@example.com",
subject: "Test email",
text: "Sending test email 123456",
}
try {
await transporter.sendMail(mailInfo)
res.send("email sent")
} catch(e) {
res.status(500).send("Something broke!")
}
})
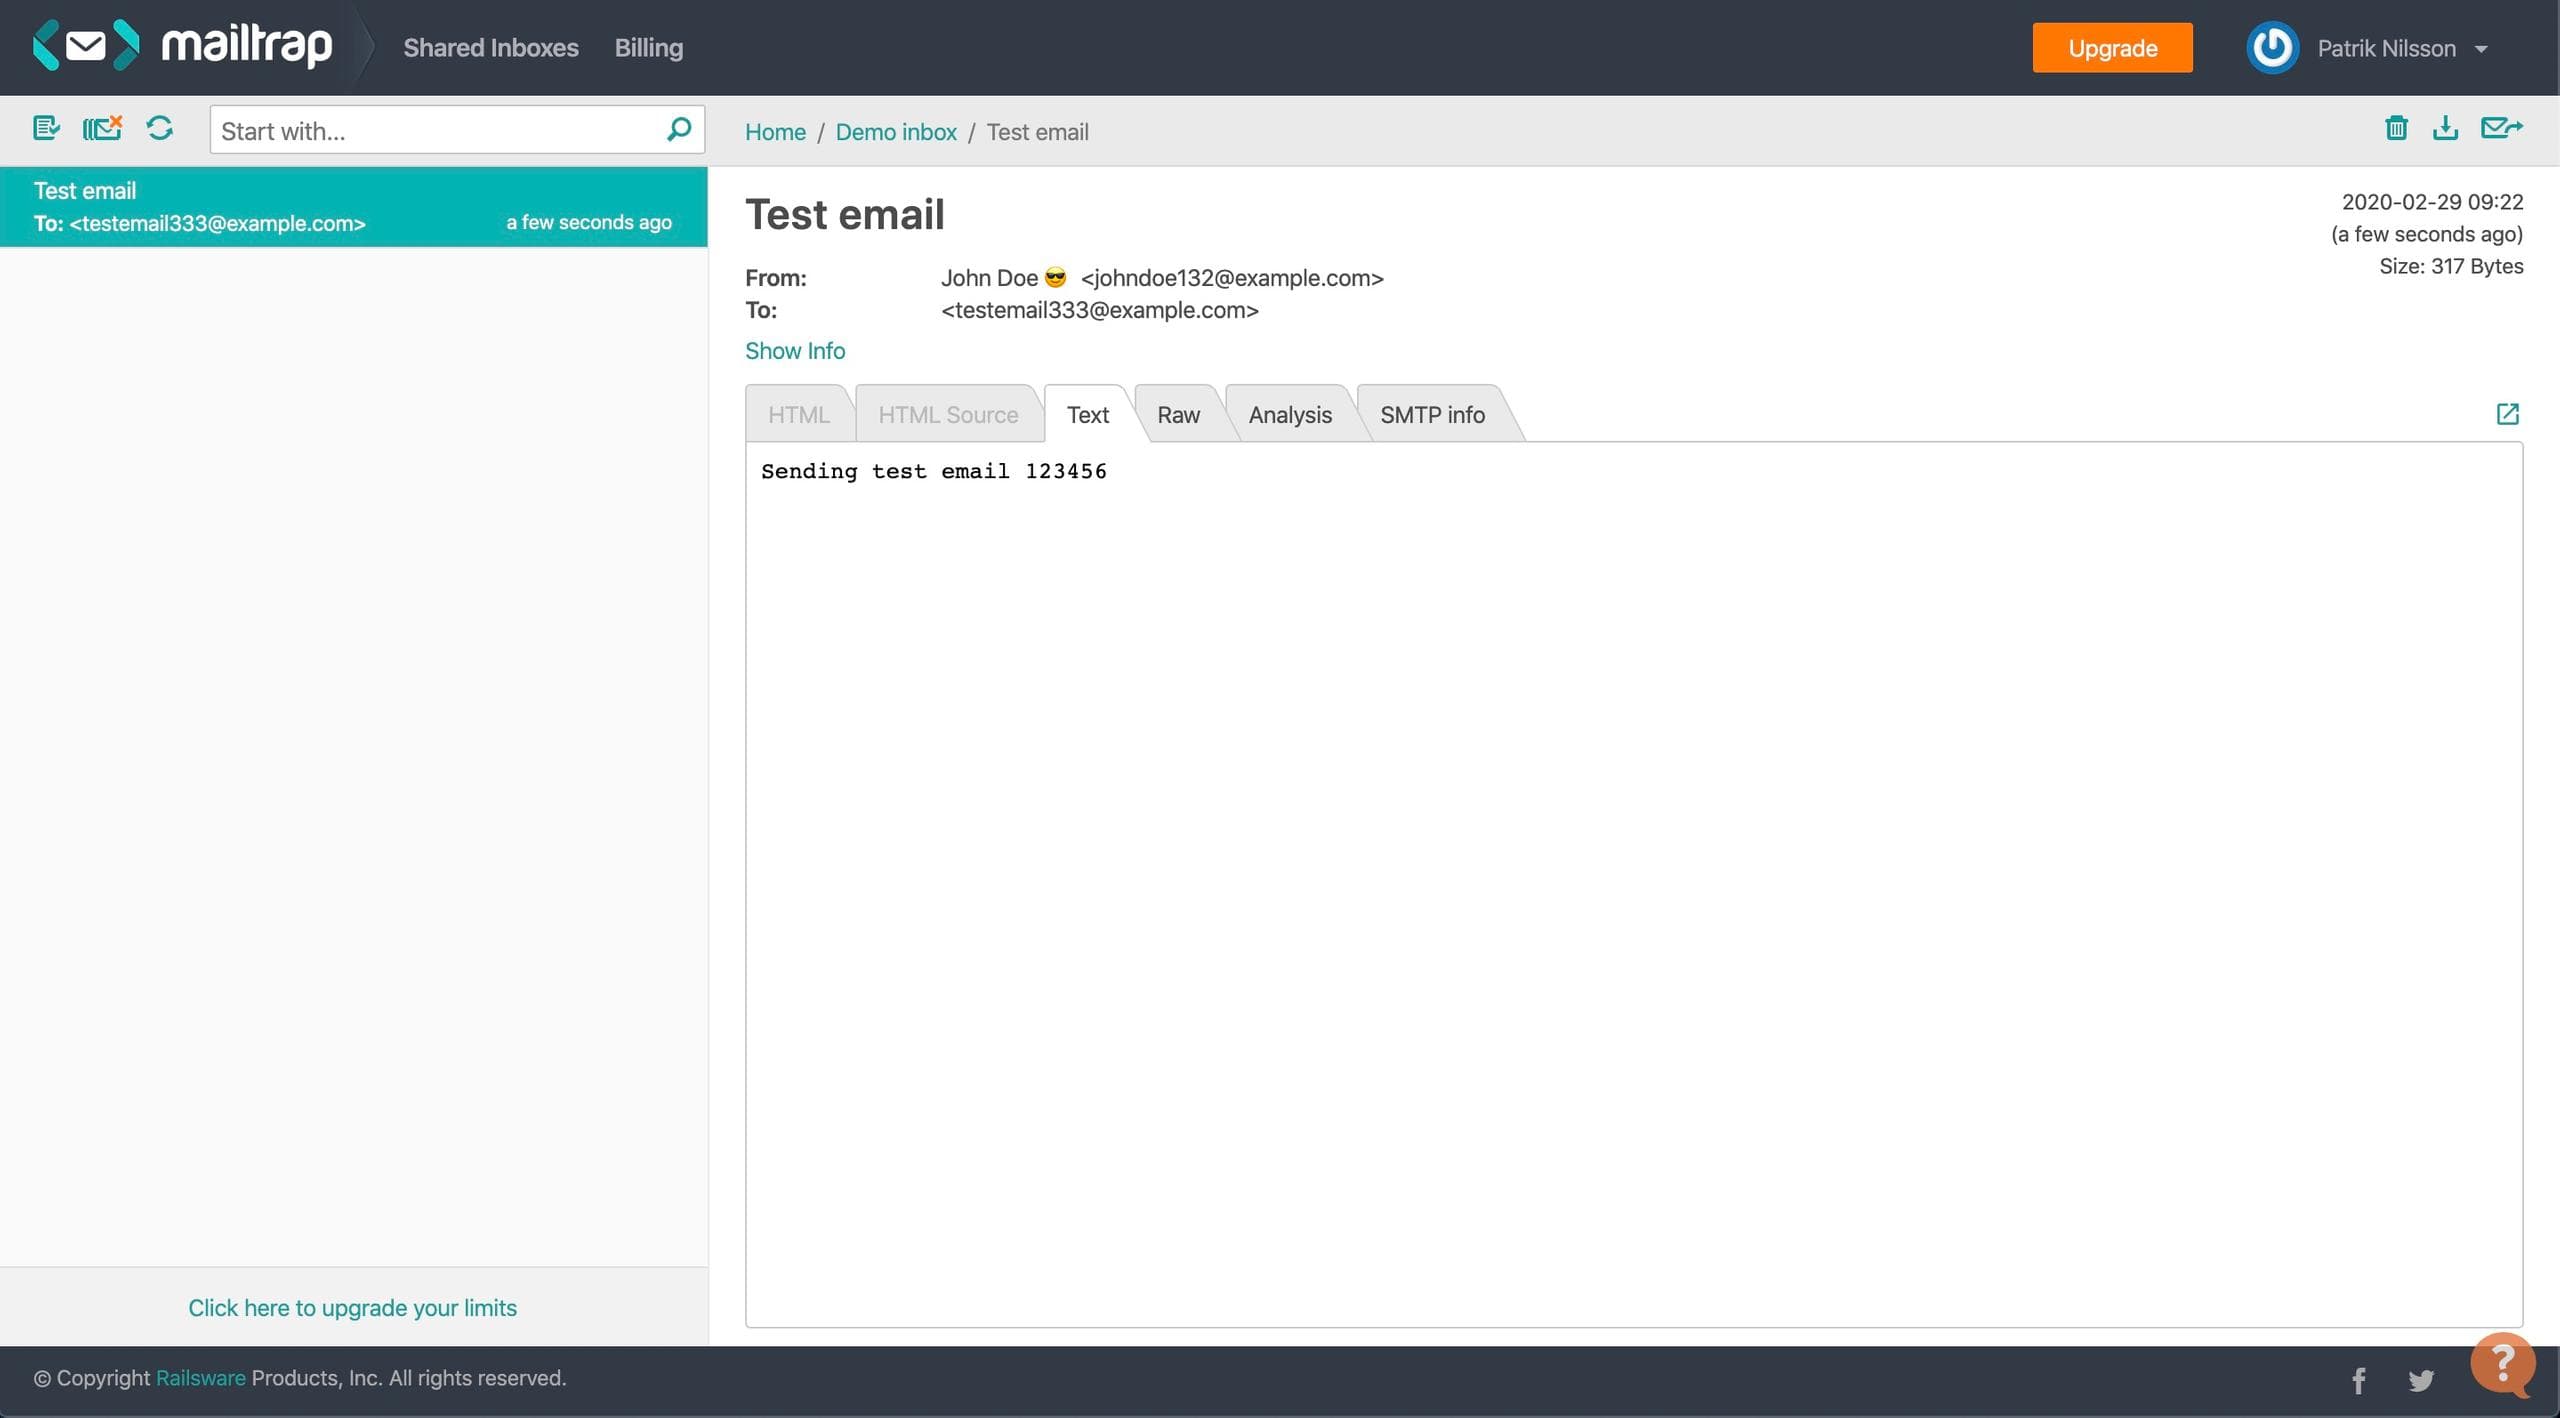
app.listen(port, () => console.log(`app listening on port ${port}!`))Every time a user visits the / route an email will be sent. Restart the node server and visit http://localhost:3000 . If you now login into your Mailtrap account you should see an email in your inbox.
Sending email with handlebars
Usually, an email will be a lot more complex. To make it easier we can use a template engine, in this example we will be using handlebars.
In the root create views folder with a layouts folder inside.
in /views/layouts create a file called main.hbs with the following content
<!DOCTYPE html>
<html lang="en">
<head>
<meta charset="UTF-8">
<meta name="viewport" content="width=device-width, initial-scale=1.0">
<title>Shop</title>
</head>
<body>
</body>
</html>All template views will extend this layout. Next step in /views create a file called orderConfirmation.hbs with the following content.
<h1>Order Confirmation</h1>
<p>Thank you , we received your order.</p>
<h2>Your order: </h2>
<h2>Total price: $</h2>You should now have this structure.
 ┣ 📂node_modules
 ┣ 📂views
 ┃ ┣ 📂layouts
 ┃ ┃ ┗ 📜main.hbs
 ┃ ┗ 📜orderConfirmation.hbs
 ┣ 📜.env
 ┣ 📜app.js
 ┣ 📜package-lock.json
 ┗ 📜package.json
The Last step is to configure nodemailer-express-handlebars
require("dotenv").config();
const express = require("express");
const nodemailer = require("nodemailer");
const hbs = require("nodemailer-express-handlebars");
const app = express();
const port = 3000;
const transporter = nodemailer.createTransport({
host: process.env.SMTP_HOST,
port: process.env.SMTP_PORT,
auth: {
user: process.env.SMTP_USER,
pass: process.env.SMTP_PASSWORD
}
});
const options = {
viewEngine: {
partialsDir: __dirname + "/views/partials",
layoutsDir: __dirname + "/views/layouts",
extname: ".hbs"
},
extName: ".hbs",
viewPath: "views"
};
transporter.use("compile", hbs(options));
app.get("/", async (req, res) => {
try {
const order = {
orderId: 948584,
name: "Patrik",
price: 50
};
const mailInfo = {
from: "shop@example.com",
to: "test943933@test.com",
subject: "Order Confirmation",
template: "orderConfirmation",
context: order
};
await transporter.sendMail(mailInfo);
res.send("email sent");
} catch (e) {
console.log(e);
res.status(500).send("Something broke!");
}
});
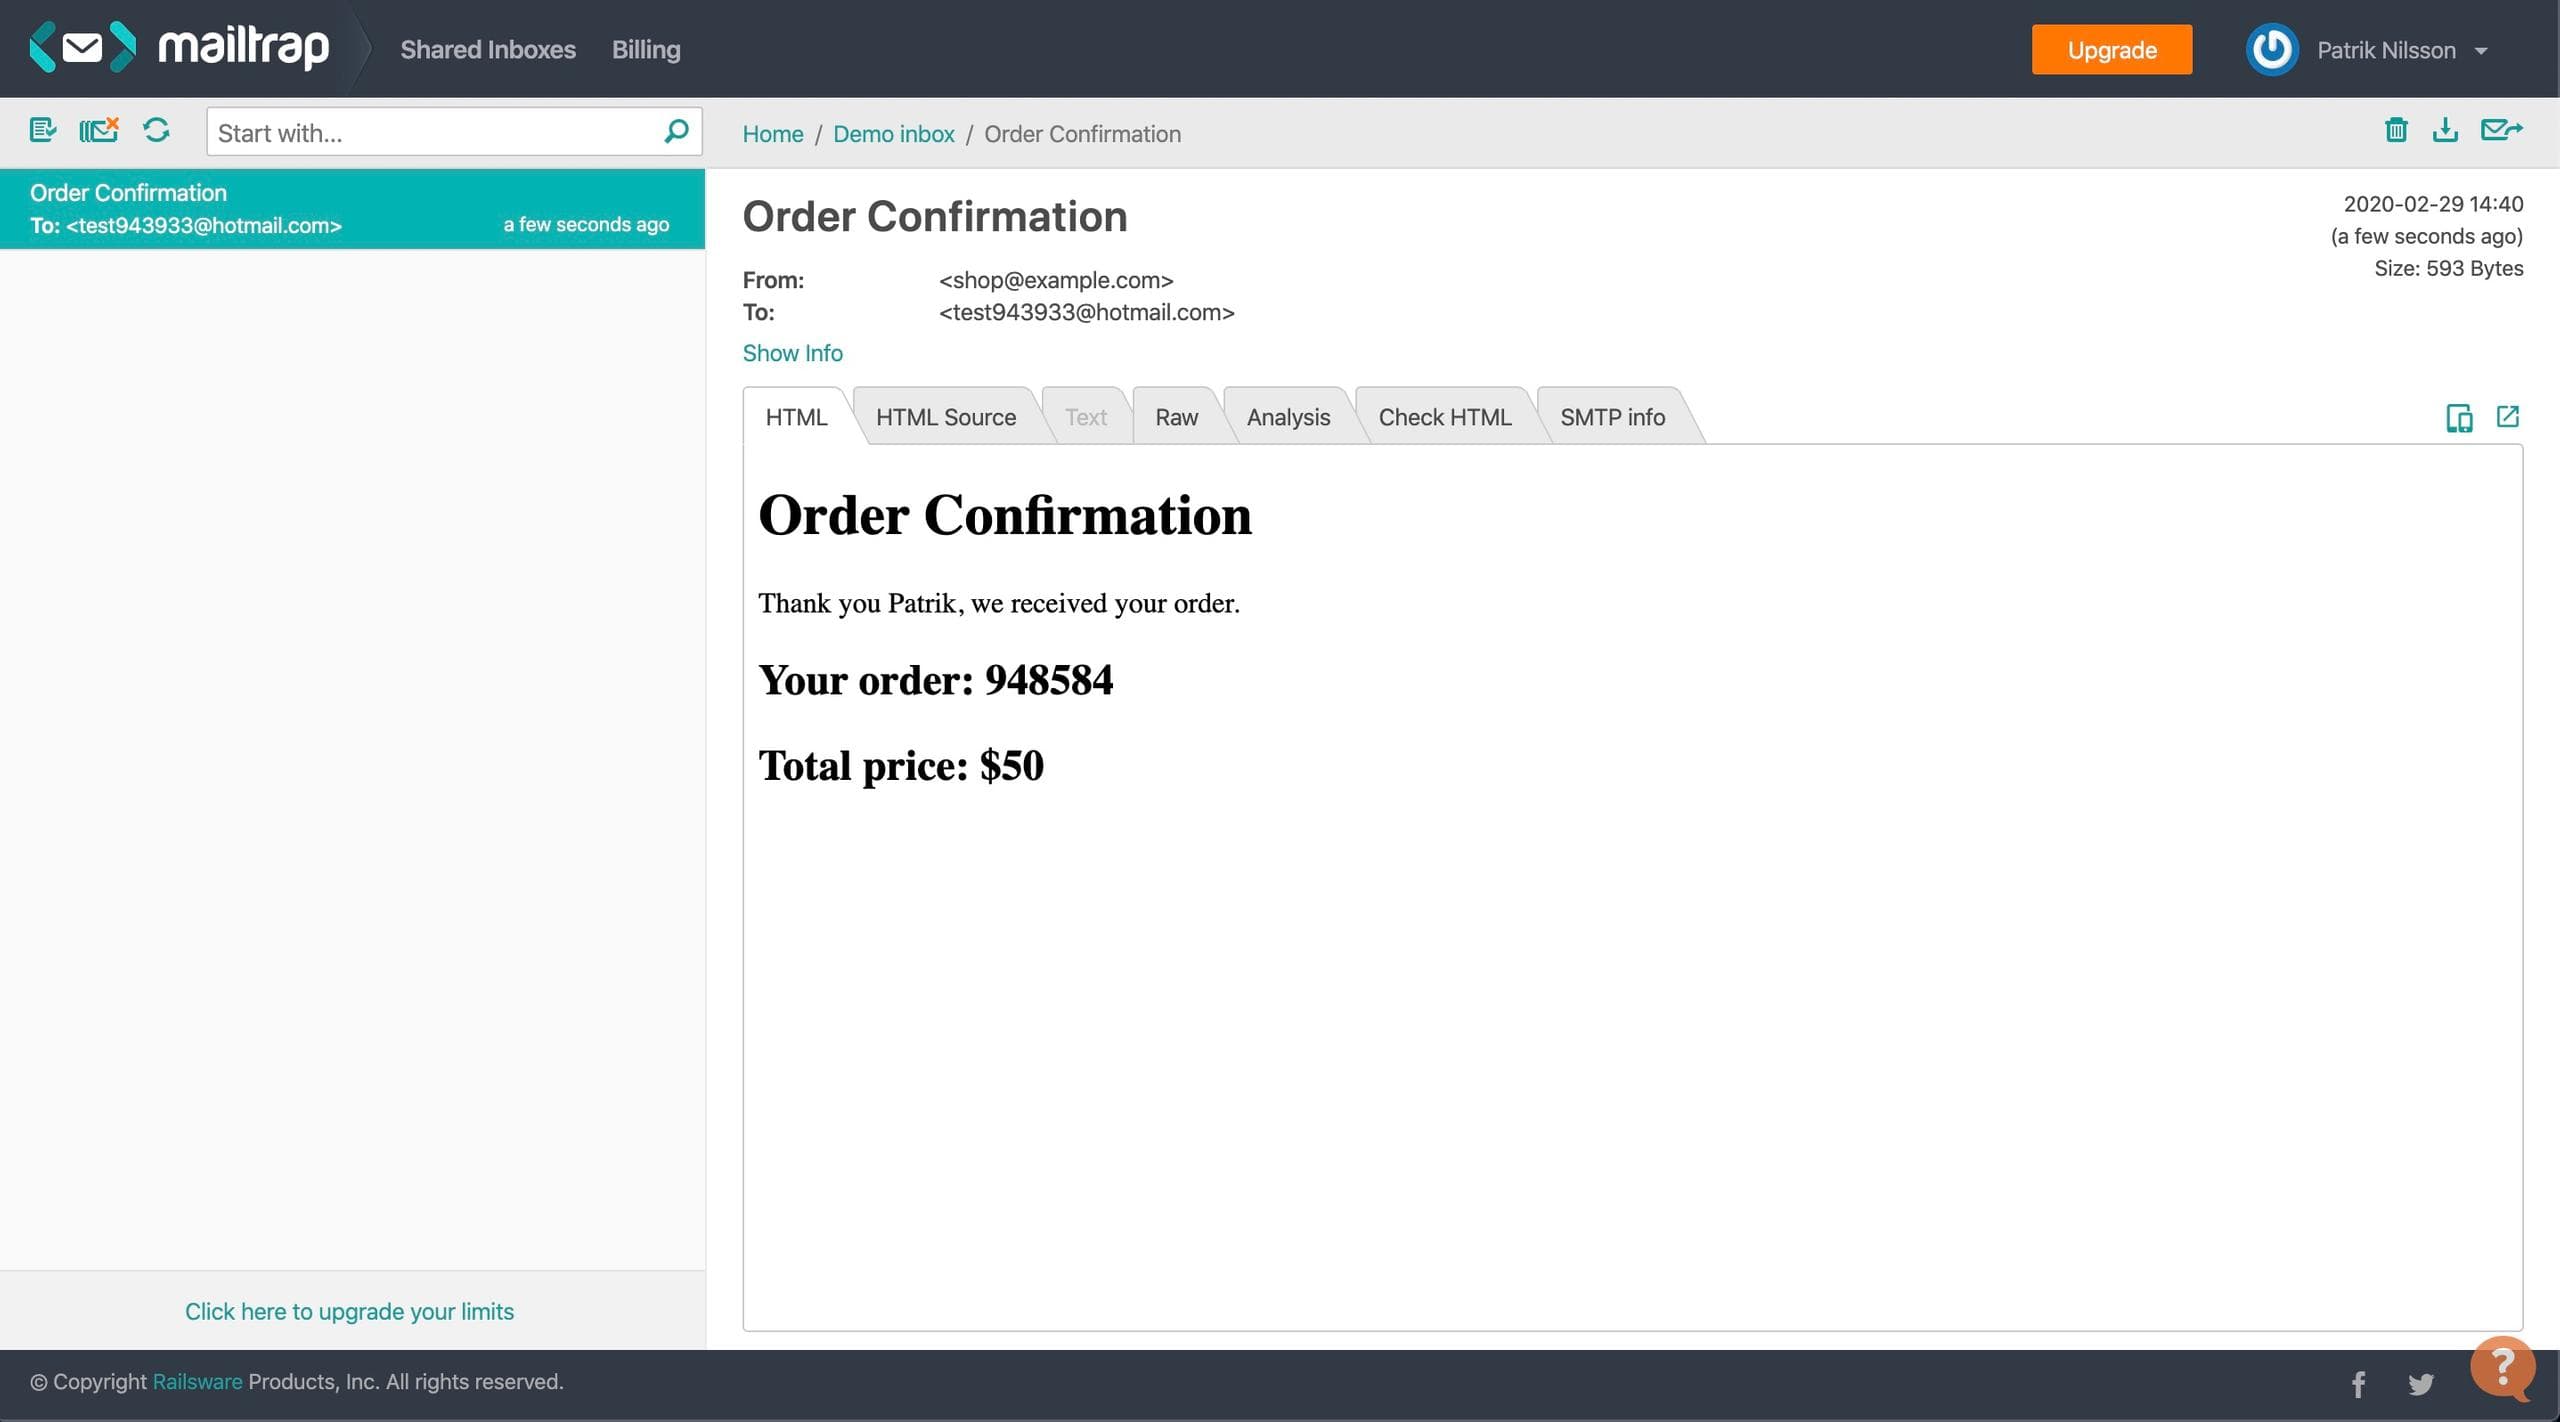
app.listen(port, () => console.log(`app listening on port ${port}!`));We tell nodemailer-express-handlebars where to find our templates. To specify we want to use a template in the sendEmail method we can pass template as a key with the name of the template we wanna use. To pass variables to the template we supply the context object.
Restart the node server and go to http://localhost:3000, this email should now pop up in your mailbox.
Include attachments
Adding attachments is very straightforward all we have to do is update our mailInfo object with a key called attachments, it's an array of objects containing a path and filename key.
At the root of the project place an image called img.jpg, if you don't have any images on your computer feel free to download this image of a lovely cat.
Now update mailInfo with the following content.
const mailInfo = {
    to: "test943933@hotmail.com",
    subject: "Order Confirmation",
    template: "orderConfirmation",
    context: order,
    attachments: [
        {
            filename: "img.jpg",
            path: "./img.jpg"
        }
    ]
};
Restart the application and visit the home route you should now get a new email with the image included.
Create an email service
Everything is working great but there is a lot of boilerplate code every time we want to send an email. Let's create an email service. Create a file called MailService.js with the following content.
const nodemailer =  require("nodemailer");
const hbs = require("nodemailer-express-handlebars");

class MailService {
  constructor(host, port, user, password) {
    const options = {
      viewEngine: {
        partialsDir: __dirname + "/views/partials",
        layoutsDir: __dirname + "/views/layouts",
        extname: ".hbs"
      },
      extName: ".hbs",
      viewPath: "views"
    };

    this._transporter = nodemailer.createTransport({
      host: process.env.SMTP_HOST,
      port: process.env.SMTP_PORT,
      auth: {
        user: process.env.SMTP_USER,
        pass:  process.env.SMTP_PASSWORD
      }
    });

    this._transporter.use("compile", hbs(options));
  }
  sendMail({to, subject, template, context, attachments}) {
    return this._transporter.sendMail({
        to,
        from: process.env.FROM_EMAIL,
        subject,
        template,
        context,
        attachments
    });
  }
}

module.exports = MailService;
Import MailService in app.js and update the old code.
require("dotenv").config();
const MailService = require("./MailService");
const express = require("express");
const mailService = new MailService();
const app = express();
const port = 3000;

app.get("/", async (req, res) => {
  try {
    const order = {
      orderId: 948584,
      name: "Patrik",
      price: 50
    };

    const mailInfo = {
      to: "test943933@hotmail.com",
      subject: "Order Confirmation",
      template: "orderConfirmation",
      context: order,
       attachments: [
        {
          filename: "img.jpg",
          path: "./img.jpg"
        }
      ]
    };

    await mailService.sendMail(mailInfo);

    res.send("email sent");

  } catch (e) {
    res.status(500).send("Something broke!");
  }
});

app.listen(port, () => console.log(`app listening on port ${port}!`));
Conclusion
In this article you learned how to send emails with node.js, You also learned how to use handlebars as email templates. By using an EmailService class we can hide away some of the boilerplate code. To send emails in production just update the environment variables with your smtp server.